Written by Barkman Concrete Published on August 31st, 2021
FEATURES
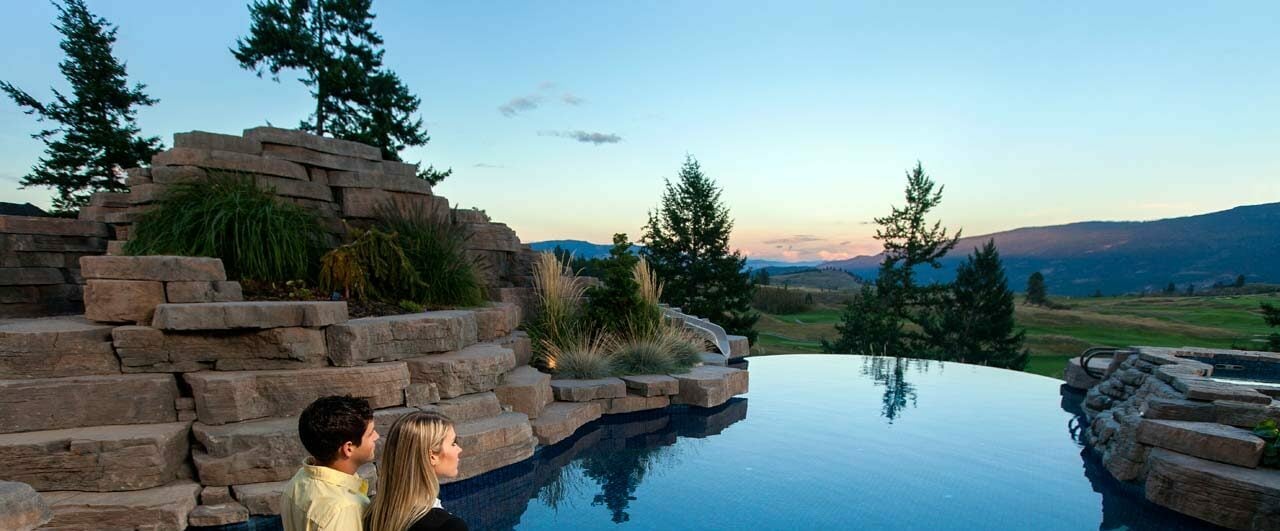
- Beautiful weathered stone textures and natural colour blends.
- Consistent dimensions equals fast installation.
- Quality materials equals long term durability.
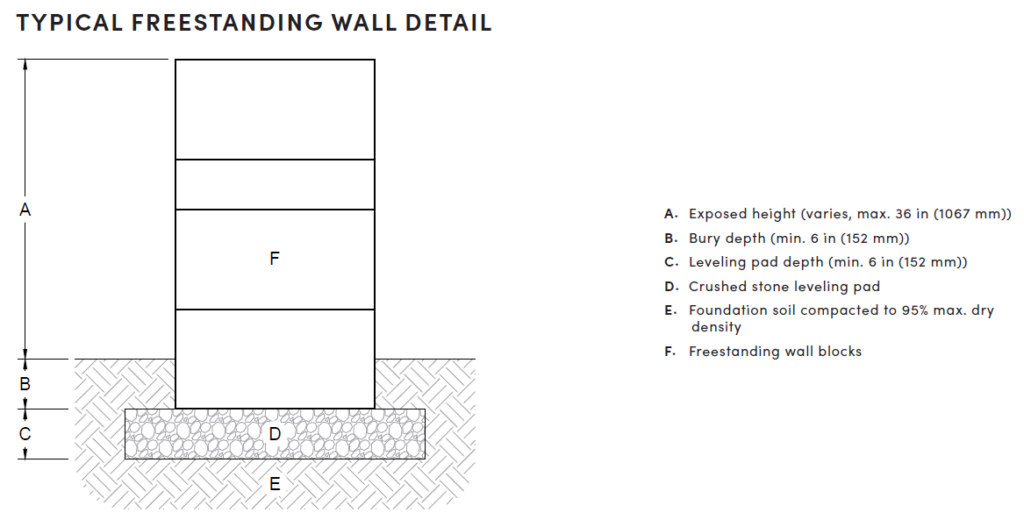
- Freestanding units have five-sided surface texture to allow for freestanding (two-sided) installations.
- Corner blocks help make a 90° corner with five-sided surface texture and can be installed with alternating faces exposed to maintain a more random look.
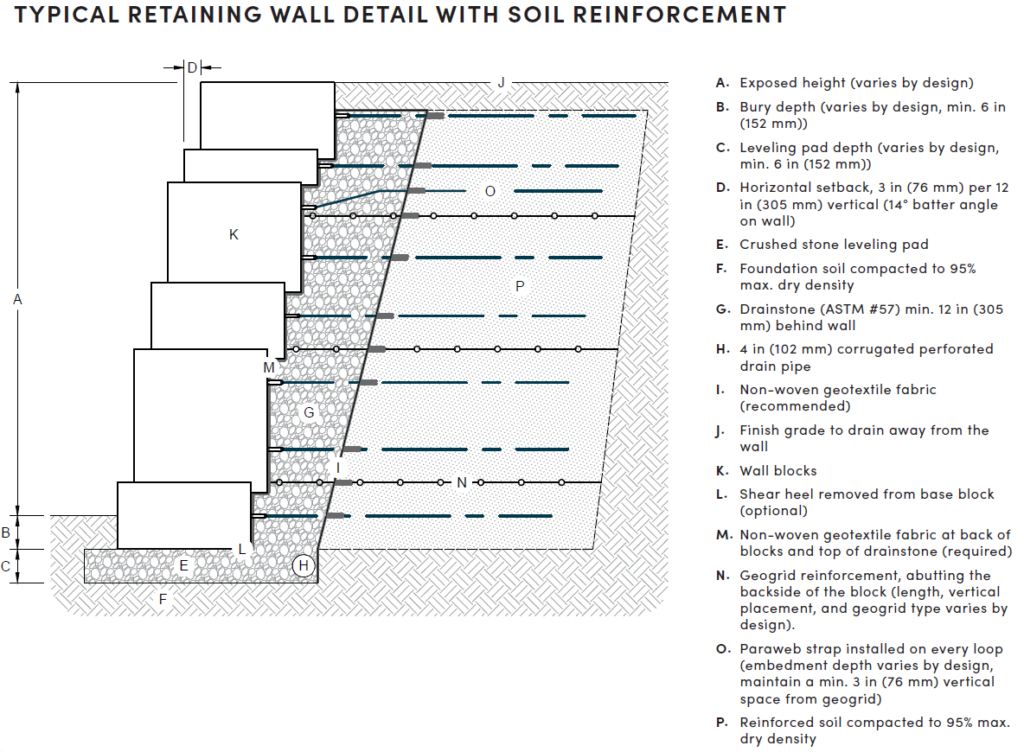
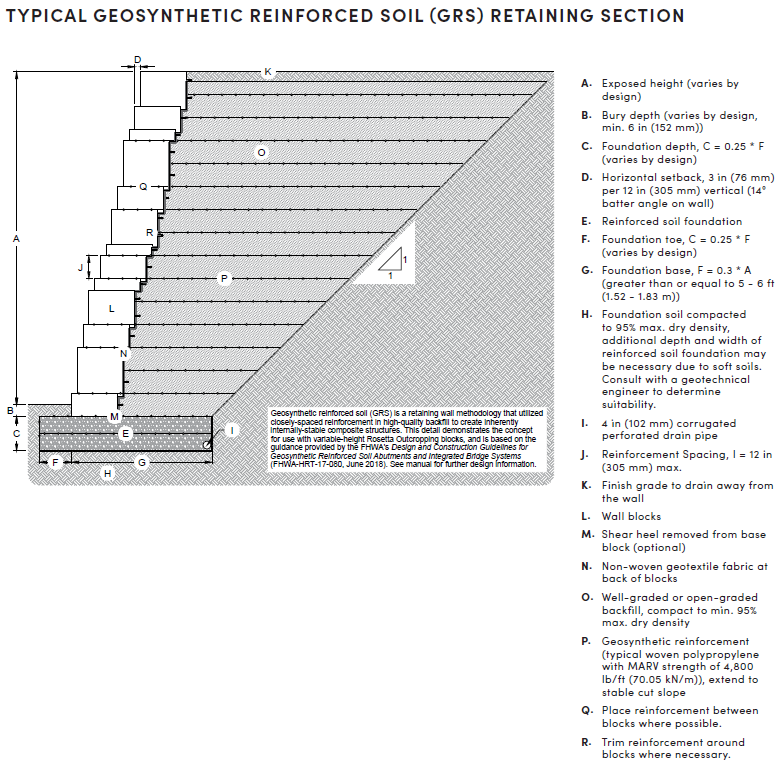
- Galvanized steel hooks are available and required for reinforced walls.
90° CORNER WALL
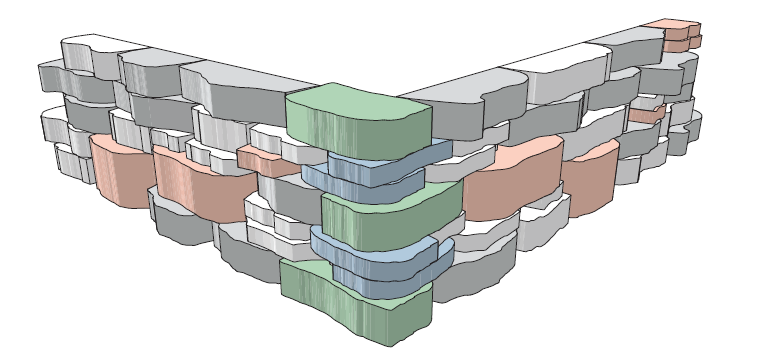
Outcropping has two corner blocks to help make a 90° corner in the wall. The corner blocks are four-sided and can be installed with alternating faces exposed to maintain a more random look.
The size of the corner blocks has been chosen to account for the wall batter in both directions. Two 6 in (152 mm) high corner blocks are
typically stacked on top of each other and placed on top of a 12 in (305 mm) block. The corner blocks are intended to be stepped back 3 in (76 mm) in both directions. In a few areas, you may need to trim a small part of the corner blocks near the back of the wall to avoid interference
with the shear heels on adjacent blocks. See the pattern shown here, which details how to make a 90° corner with (4) A pallets, (4) B pallets, (2) C pallets, (3) 12 in (305 mm) corner blocks and (4) 6 in (152 mm) corner blocks.

CURVES
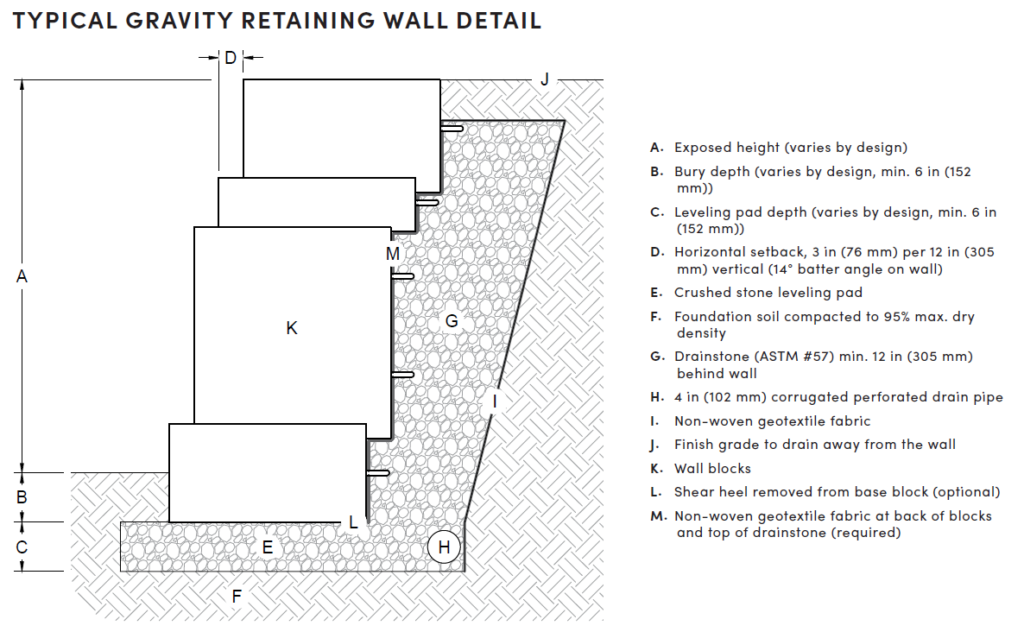
Outcropping blocks have shear heels to help with wall integrity and provide a setback from lower blocks in the wall, thus causing the wall to batter back. The batter is important to the engineering design of the wall, and it must be accounted for during the construction of a curved wall section.
OUTSIDE (CONVEX) CURVE
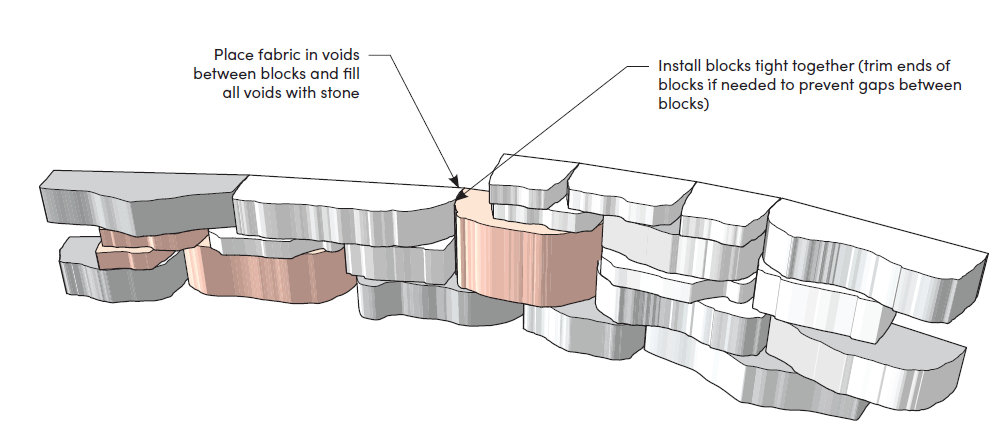
If you are constructing an outside (convex) curve, the wall batter will cause the blocks higher in the wall to have a shorter radius around the curve than lower blocks. This will cause the higher blocks to ingrow into the wall layout pattern. (This is similar in concept to the inside lane of a race track being shorter than the outside lane). The result is a potential overlap between some of the blocks in the wall. The best way to deal with this overlap is to saw cut the end of the smaller block, which allows the blocks to fit tight together and all the shear heels to be properly engaged. This saw cut is typically made on an angle to match the taper on the block you are abutting.

INSIDE (CONCAVE) CURVE
If you are constructing an inside (concave) curve, the wall batter will cause the block higher in the wall to have a longer radius around the curve than lower blocks. The important step when constructing an inside curve is to keep all blocks tight together. In most cases, the blocks will touch somewhere along the sides of the blocks, not at the back of the blocks. If needed, you can trim the ends off some blocks to prevent gaps from opening up between blocks. When constructing a curve with a short radius, voids may form at the back of the wall where two blocks meet. If this happens simply fill the void areas with filter fabric and drainstone.
GENERAL NOTES FOR WALL SECTIONS
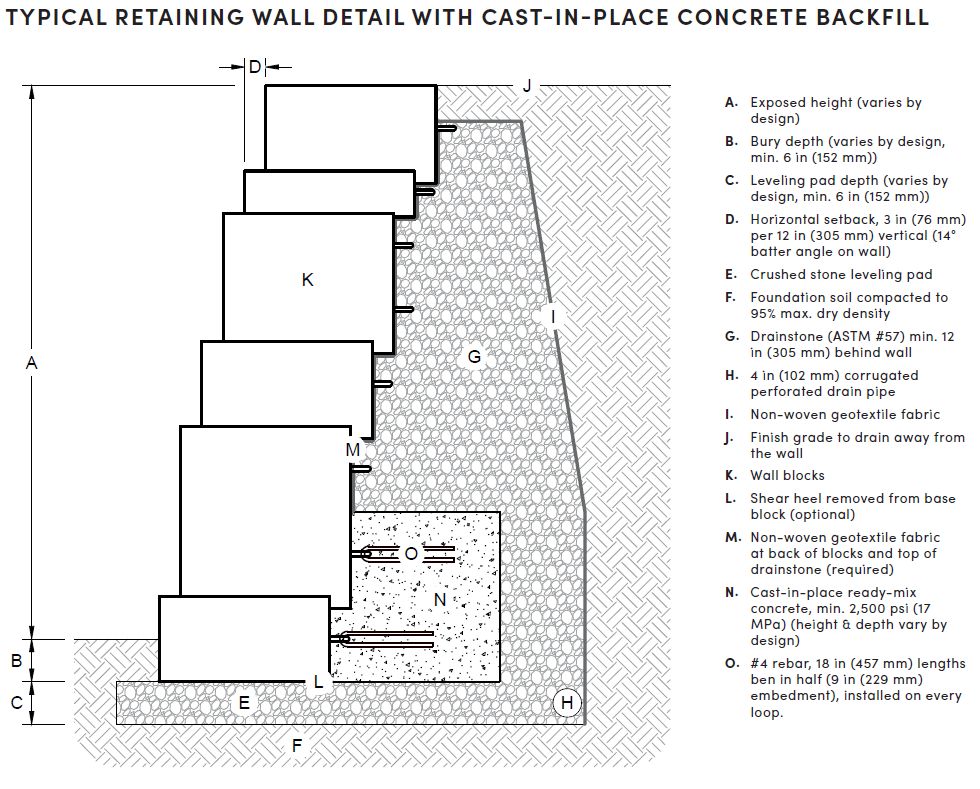
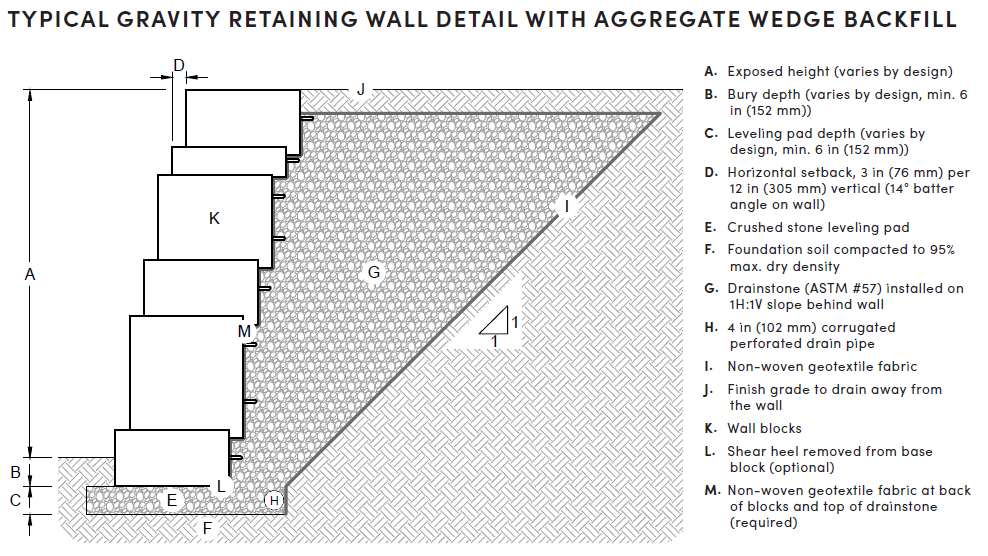
These drawings are representative of major components required in wall construction. Specific details including geotextile reinforcement layers, drainage details, soil requirements, etc. shall be per engineered design for the wall. For more cross-section and design options, visit our website.
- These drawings are for preliminary reference only (not for final construction).
- Final designs for construction must be prepared by a registered professional engineer using the actual conditions of the proposed site and loads.
- Block size and placement shown are for reference only; individual Outcropping blocks will vary with installation pattern.
